|
|||||||||
|
|||||||||
• Geodesic Dome Basics
• Applying a Shrink Wrap Geodesic Dome Cover
Creating a geodesic form is really quite simple, contrary to what you might think by examining only the end product. To start, a polyhedron must first be chosen, a shape with faces and sides that are all the same. In this example we explain icosahedral geodesics, so we begin with an icosahedron (shown in Figure 1), a shape with 20 triangular faces. Most geodesic domes are icosahedral, though of course others are possible, most notably the octahedral dome (based off an octahedron, which is an 8 sided object). A geodesic structure can be made from any base shape, but for practical purposes such as symmetry and reducing the number of different strut types required to build the structure, regular shapes such as polyhedrons are generally used.
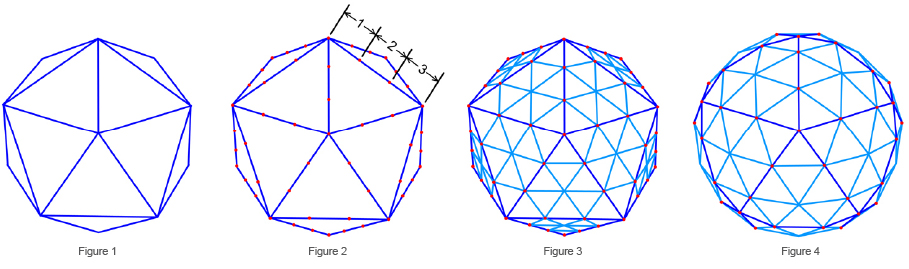
This example shows how a 3v frequency dome is created (which is probably the most common geodesic structure found worldwide). Frequency refers to the number of struts along each side of every face triangle. Figure 2 shows how each side is divided into 3 equal lengths.
Figure 3 depicts the next step, in which each face is sub-divided into smaller triangles. The pattern in this example is technically referred to as a Class I breakdown, where each side of every small triangle is parallel to one side of the parent face triangle. The Class II breakdown pattern is characterized by small triangles with sides that are perpendicular to the sides of the parent face triangle.
Figure 4 depicts the final step in which the newly created vertices (joints where struts come together) are pushed outward until they are all the same distance from the center of the icosahedron. In a 3v frequency geodesic sphere there are 3 different strut lengths (note though the number of strut types does not correspond to the frequency in domes of higher frequency).
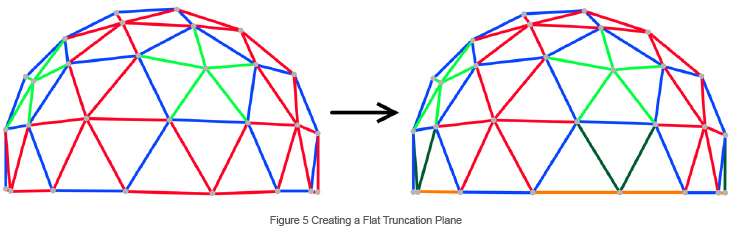
You may notice that there are 5 strut types in our 3v geodesic dome kits, and this is because the joints along the bottom of the dome do not naturally form a flat plane, and so two special strut types, which we refer to as truncation struts, are required to force a truly flat plane. Figure 5 shows the slight “wobble” that a 3v dome without truncation struts would have along its base. All odd frequency geodesic domes (3v, 5v, 7v, etc.) require special truncation struts to make their base planes truly flat. Interestingly, even frequency domes (2v, 4v, 6v, etc.) can always form a perfectly flat base plane without truncation struts if the geodesic sphere is cut exactly in half.
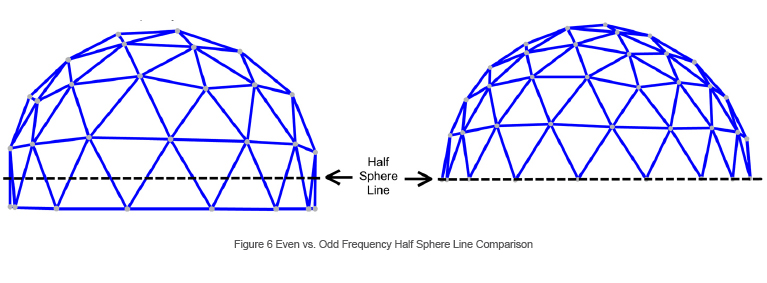
Even frequency domes, as was just mentioned, will divide exactly in half, but odd frequency domes will not without cutting through the middle of a row of struts. Figure 6 illustrates the situation. Odd frequency domes must then be truncated just above or just below exactly half a sphere. Since truncation just below half a sphere will conveniently provide extra headroom inside the dome, all of our odd frequency dome kits are truncated in this fashion.
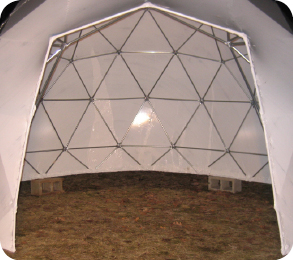
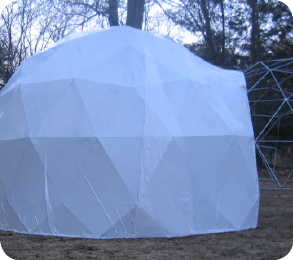
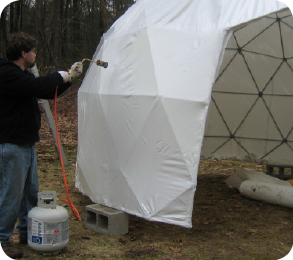
Creating a shrink wrap cover for a geodesic dome is easy, and actually rather a lot of fun. Below are several pictures of a white marine shrink wrap cover being applied to a 12 ft 3v with a short base cylinder (this dome has the pentagon doorway with the optional awning). Here is a summary, and then a detailed explanation:
• pull shrink wrap over the dome frame
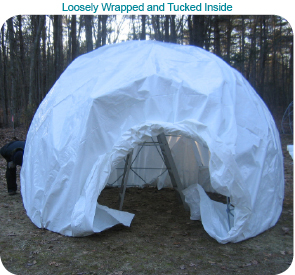
• tuck it under the frame and pull it tight (make a few pleats to help)
• cut away the excess plastic inside the dome
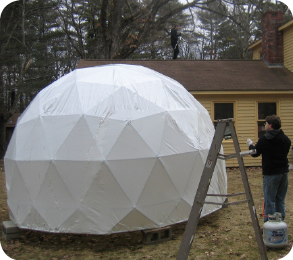
• wrap the plastic around the bottom struts and heat weld it to itself
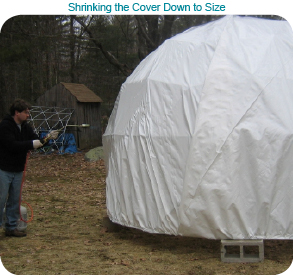
• shrink the cover down to size with a heat gun or weed burnerWarning: shrink wrap can burn, so remove all flammable debris from around the dome, never apply a shrink wrap cover when there is any wind, and always keep a fire extinguisher on hand. For safety, never apply a shrink wrap cover alone, and always be mindful of carbon monoxide.
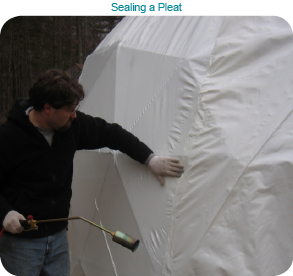
To start, unroll the shrink wrap and pull it over the completed frame. The shrink wrap is folded to make it a manageable width, so the next step is to unfold it in place. It comes in a what is called a center fold arrangement, and all you need to do is pull the loose ends towards opposite sides of the dome. Once you are here, tuck the shrink wrap under the frame towards the inside of the dome. Go inside and pull in all the excess you can. Since you are trying to make a sphere out of a flat sheet, it will be necessary to make some pleats outside. When you have made the shrink wrap reasonably snug, cut away the excess around the base of the dome and the doorway from the inside, leaving about 3 inches behind.

Next, you will wrap that 3 inch portion around the base struts and doorway struts, and heat weld it to itself. This is very quick and easy since the shrink wrap sticks to itself readily. I recommend a propane blowtorch with the push button auto ignition, but a regular blowtorch will do if that’s all you have on hand. Just point the torch between the two pieces of shrink wrap, and heat for only about 1 second. Then stick the two pieces together, quickly but gently. Here we are just trying to hold the cover down so that it won’t lift up when you shrink the outside, so it isn’t necessary to create a perfect weld. You can just weld a few inches at a time, and the whole thing will be done in minutes.
With the cover fastened down, you can now shrink the main body of the cover down to size. You can use an expensive heat shrink gun, but a propane weed burner will also work just fine (this is what is being used in the photos). You will need to remove all leaves and flammable debris from around the base of the dome before you start. The dome in the photos was temporarily placed on cinder blocks to get it away from such debris.Shrinking the cover is very straightforward, just heat quickly and keep moving. The plastic will shrink when you apply heat, and will continue to shrink further as it cools down, so it is important to give the plastic time to shrink completely. The best way is just to move around the dome in one direction, and this way the plastic will have plenty of time to cool down. Do not try to remove all the wrinkles in a single pass because you will end up over shrinking and creating holes. Just keep moving around the dome until you are satisfied with its fit.
When everything looks good, you will then heat weld the pleats. Do this just as you did when you were welding inside the dome, and work from the base up so that the rising heat works to your advantage.
When you are done you may want to apply some shrink wrap tape over the pleat seams just to ensure no rainwater gets in. If you created any holes in the cover you can easily patch them with the shrink wrap tape. I recommend patching from both the outside and the inside if you can. If you created a large hole, it is also possible to weld on a scrap piece of shrink wrap.
Optional Air Gap Insulation
Start by applying a shrink wrap cover to the outside of the dome and shrinking it down to size. Once it is complete, use a marker to make a dot at the location of every frame bolt. Next, remove the cover and set it aside (this will become the interior plastic layer). Apply a new cover to the dome, and this time it will remain in place as the outside layer. Now pick up the original cover, bring it inside the dome, and push the frame bolts through the dots you marked on the shrink wrap. Use some large rubber circles as washers to hold the shrink wrap in place. Once you have done this with all the joints, you can heat weld the interior cover to the exterior cover along all the edges. Finally, apply some additional heat to the interior cover to shrink it down that little bit further and make it look nice.
© Copyright Sunrise Domes. All Rights Reserved.